
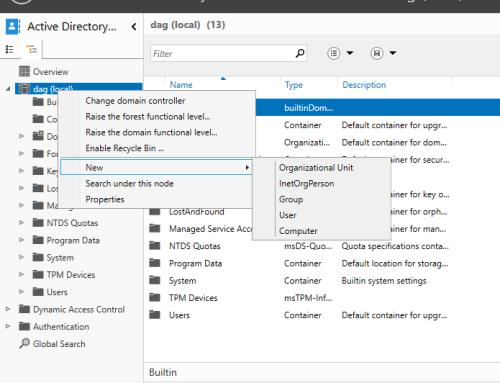
One of the ‘shared service’ environment requirements for Dynamics 365 for Finance and Operations is an Active Directory domain. There should never be just one Active Directory server, so we’ll create two Windows Server 2016 virtual machines. AX needs an Active Directory functional version of at least 2012 R2. The requirements when using Windows Server 2016 are 1 vCPU and 2GB of RAM (although I allocate 4GB and use dynamic memory).
In a later post we’ll set up ADFS and Azure Active Directory (AAD).
Creation of the Hyper-V VM
1. Open Hyper-V Manager
2. Click “New virtual machine”
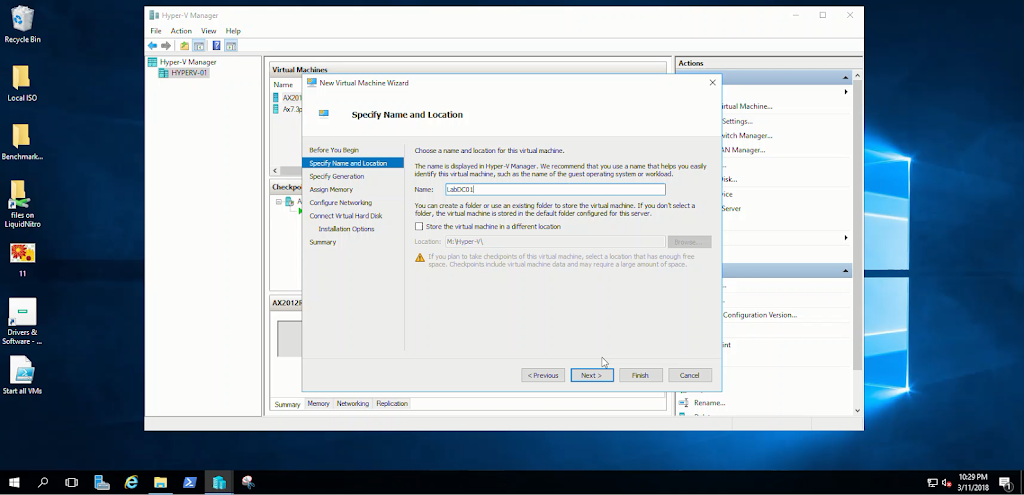
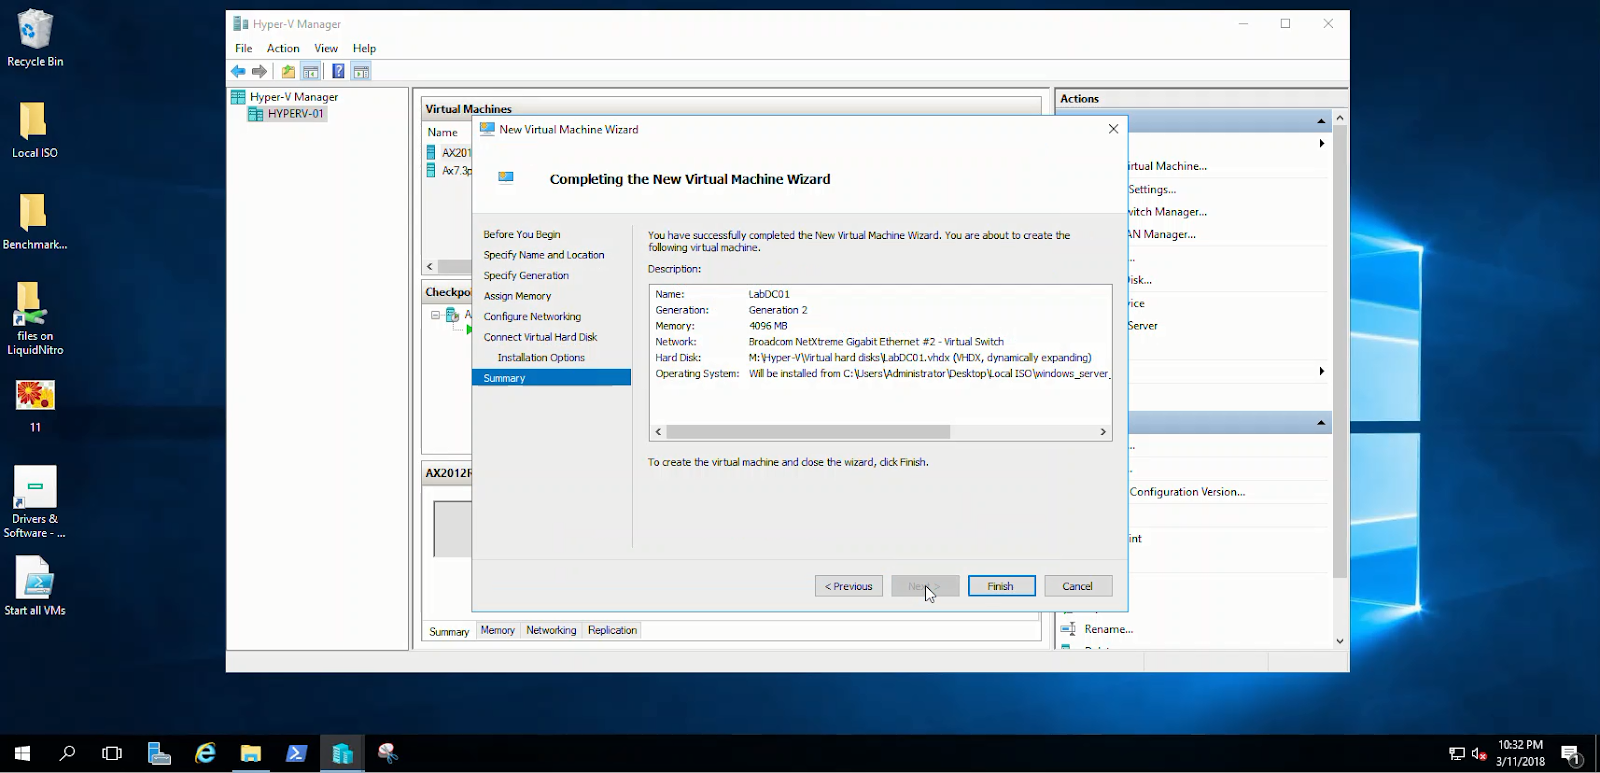
3. Specify a name, i.e. LabDC01

4. Select “Generation 2” for the generation of the virtual machine
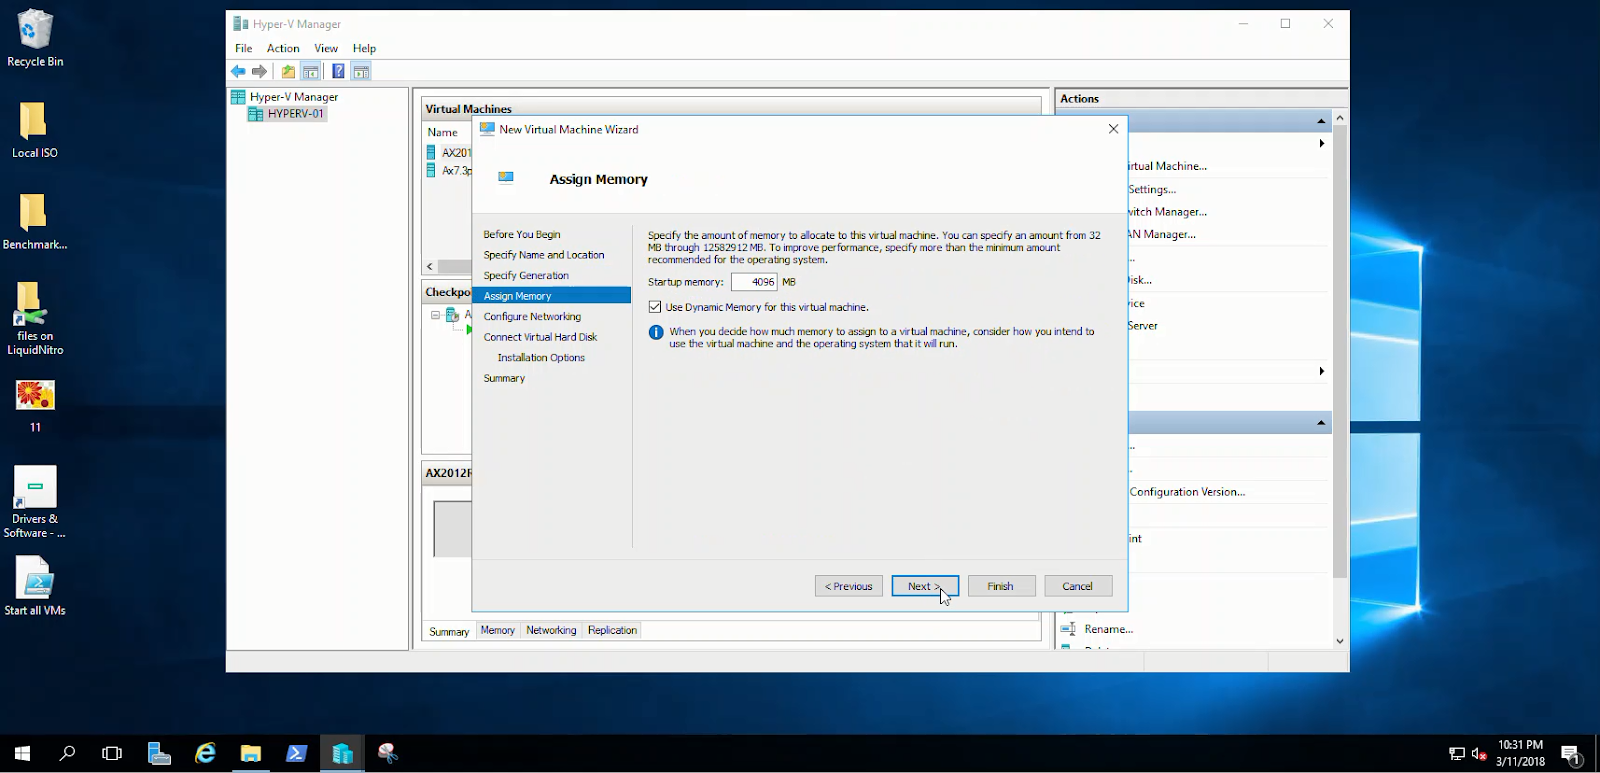
5. Specify 4096 MB of dynamic memory
6. Create a new virtual hard disk. I specified 80 GB to be save, as the disk will only take the space it requires. After I completed all the steps here, including Windows Updates, the disks were taking less than 20GB.
7. Attach an iso file of Windows Server 2016 as your option for installation.
8. Click finish
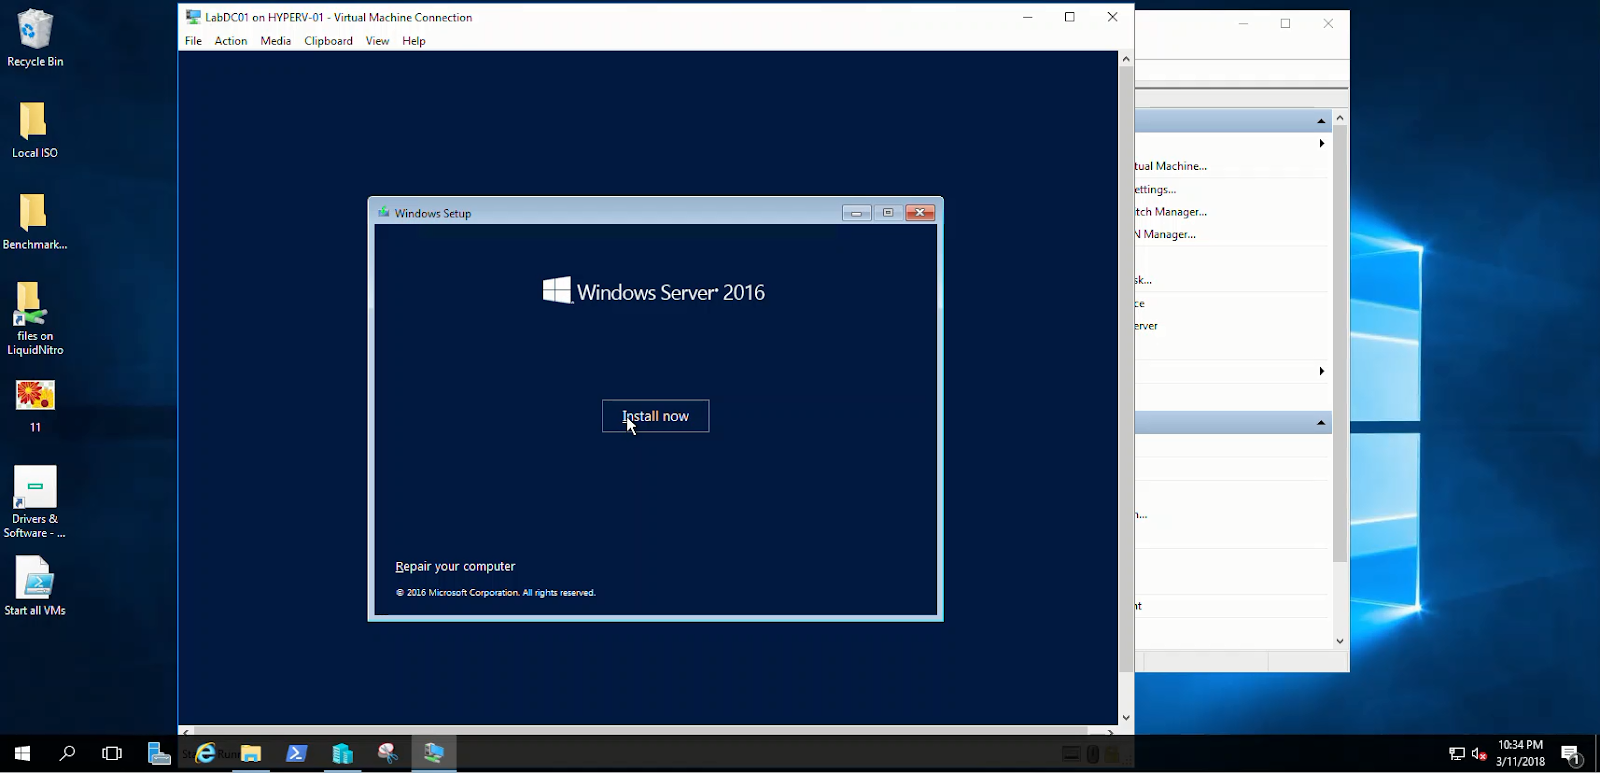
9. Start the VM
Do the same for the second VM.
Setting up the first Domain Controller
10. Go through the installation of Windows Server 2016. There are very few questions, however, I did chose to install the Desktop Experience. For the key, I chose to install without a key to see if the AVMA feature of Hyper-V works.
11. After installation, change computer name, i.e. LabDC01.

12. Disable the firewall (this is an internal server which can be scrapped if needed).

13. Enable RDP connections

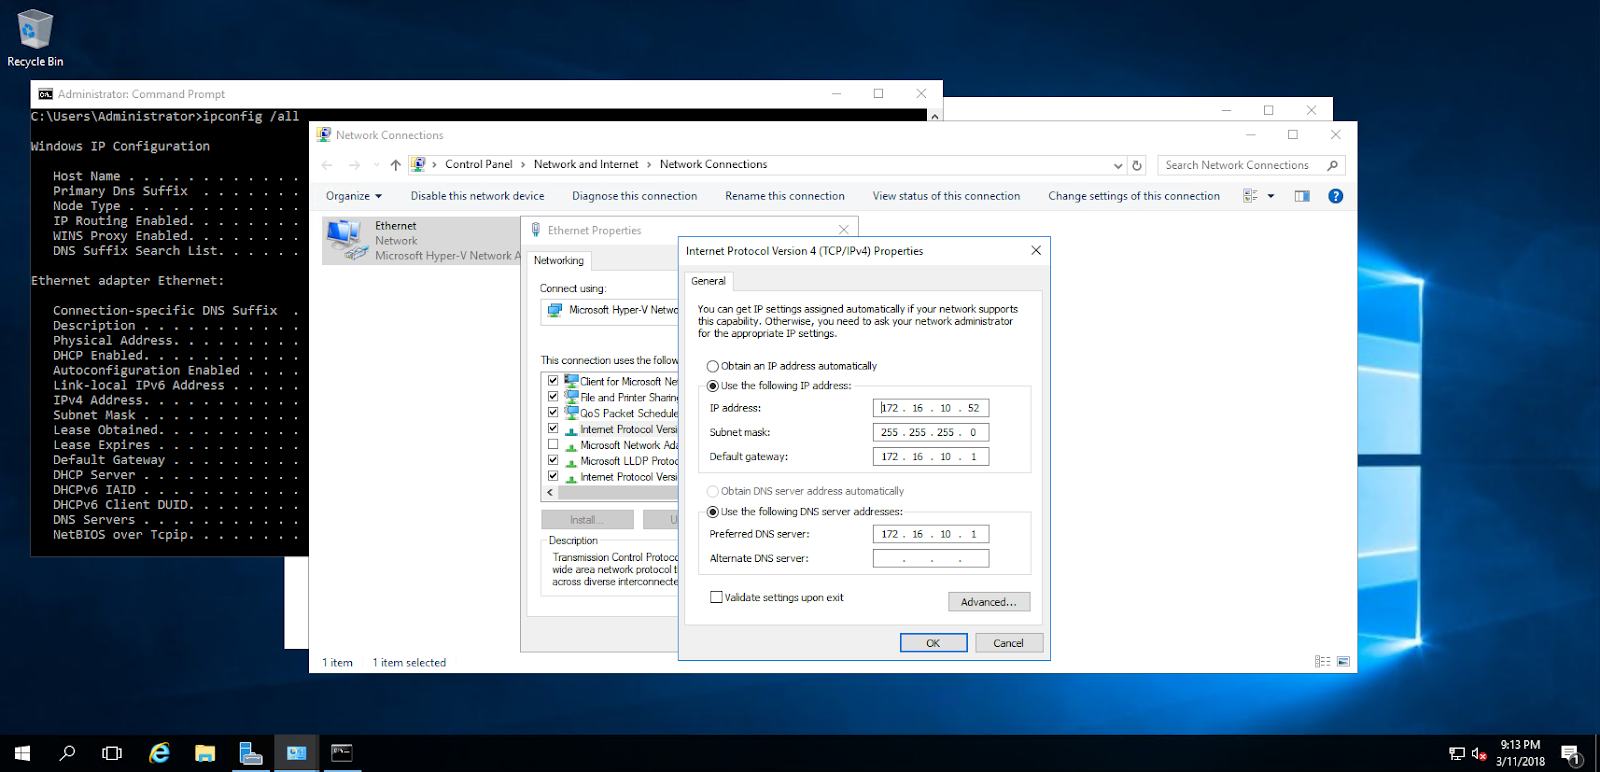
14. Give it a static IP- this is required for setting up these servers to host DNS. Choose an IP address which will be reserved for this server. Make sure that you do not give this IP address to another device later. The DNS setting in the screenshot is the upstream DNS, which in my case is a local pfSense firewall/server.
15. Turn off IE Enhanced Security
16. Restart
Add the Active Directory Domain Services and DNS Server roles
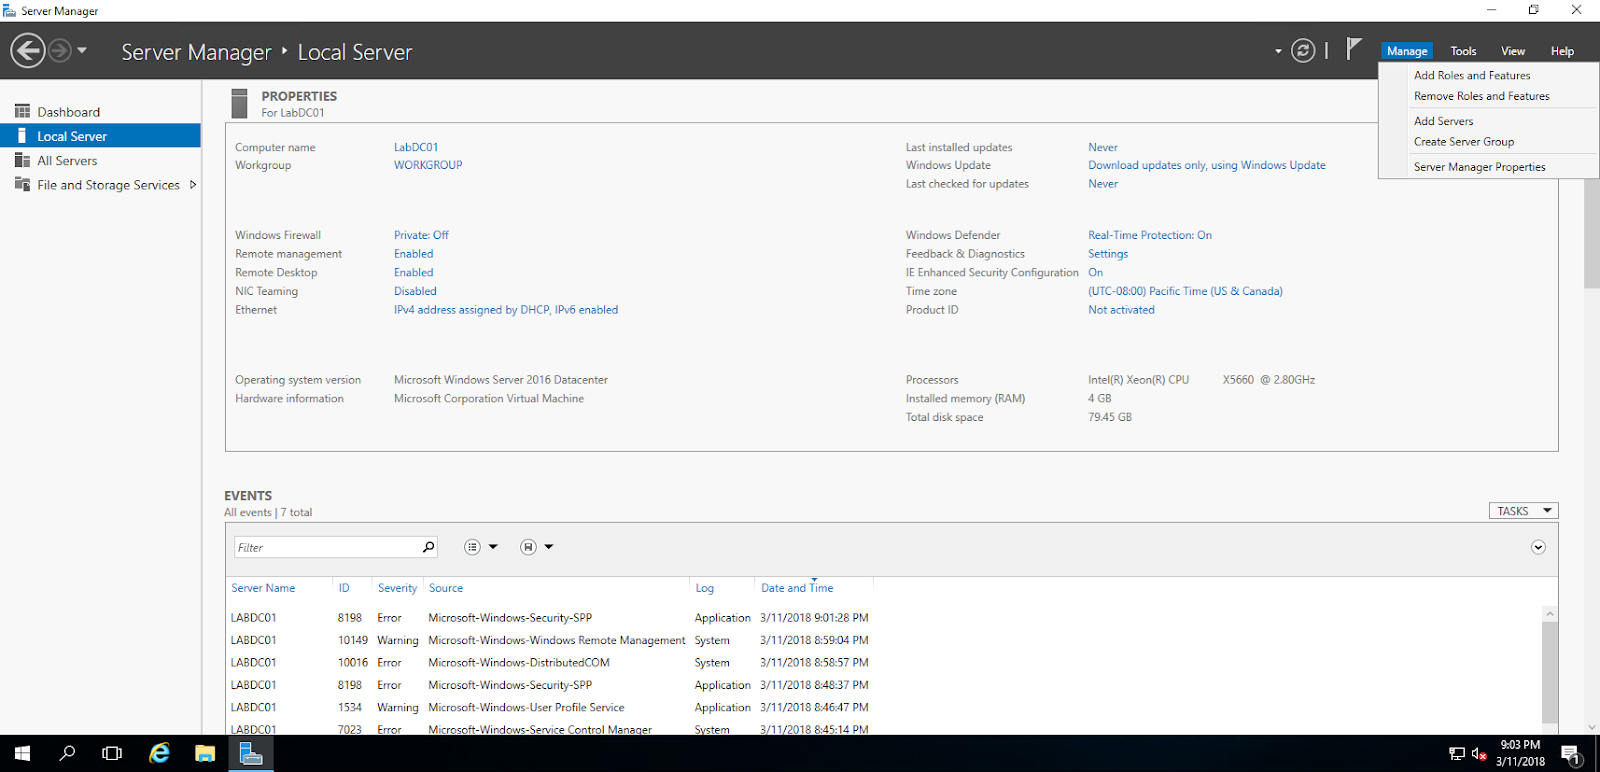
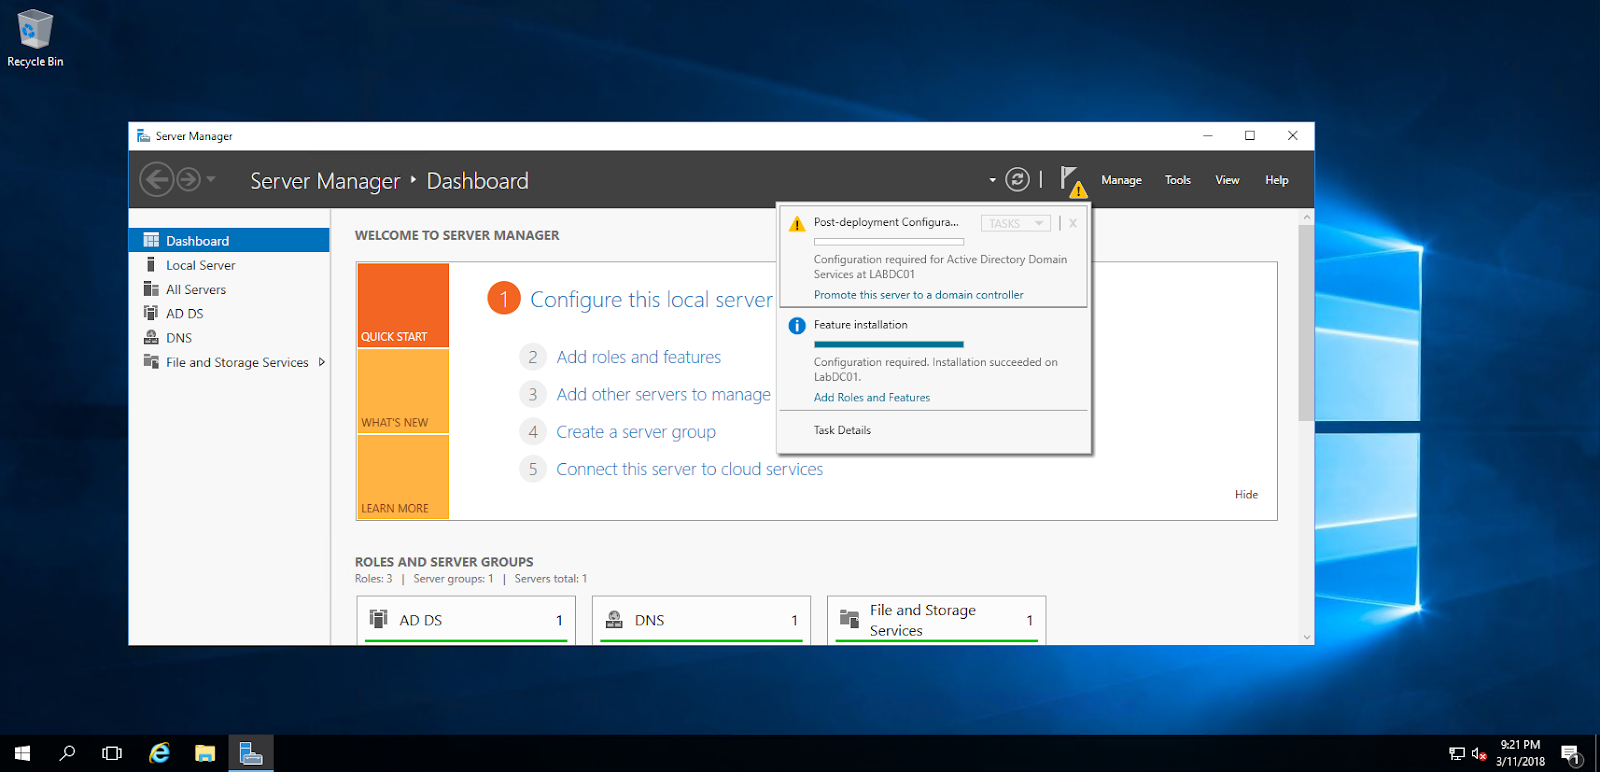
17. In the server manager that automatically opens when the server restarts, click “Manage > Add Roles and Features”
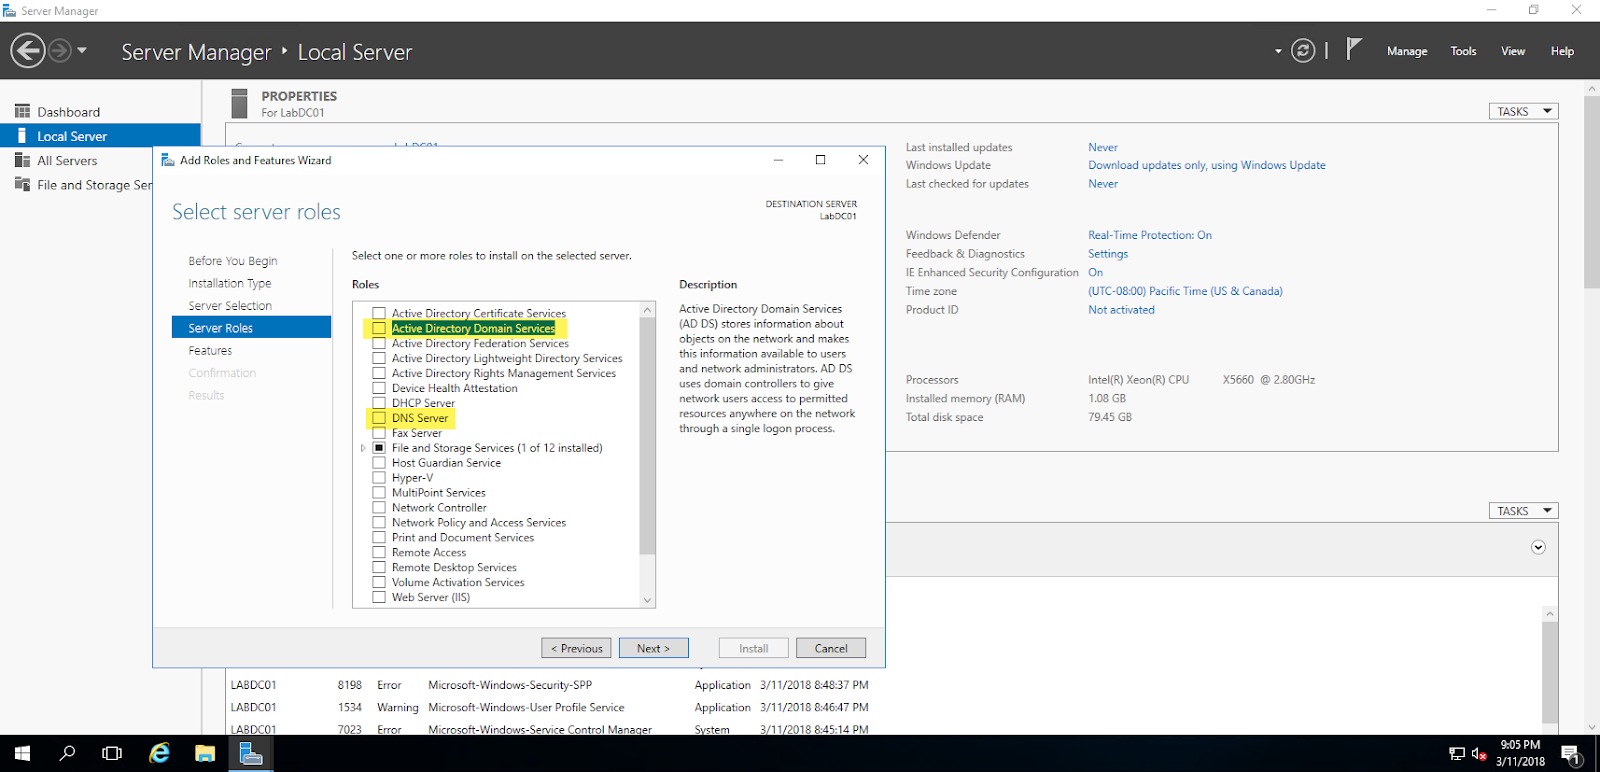
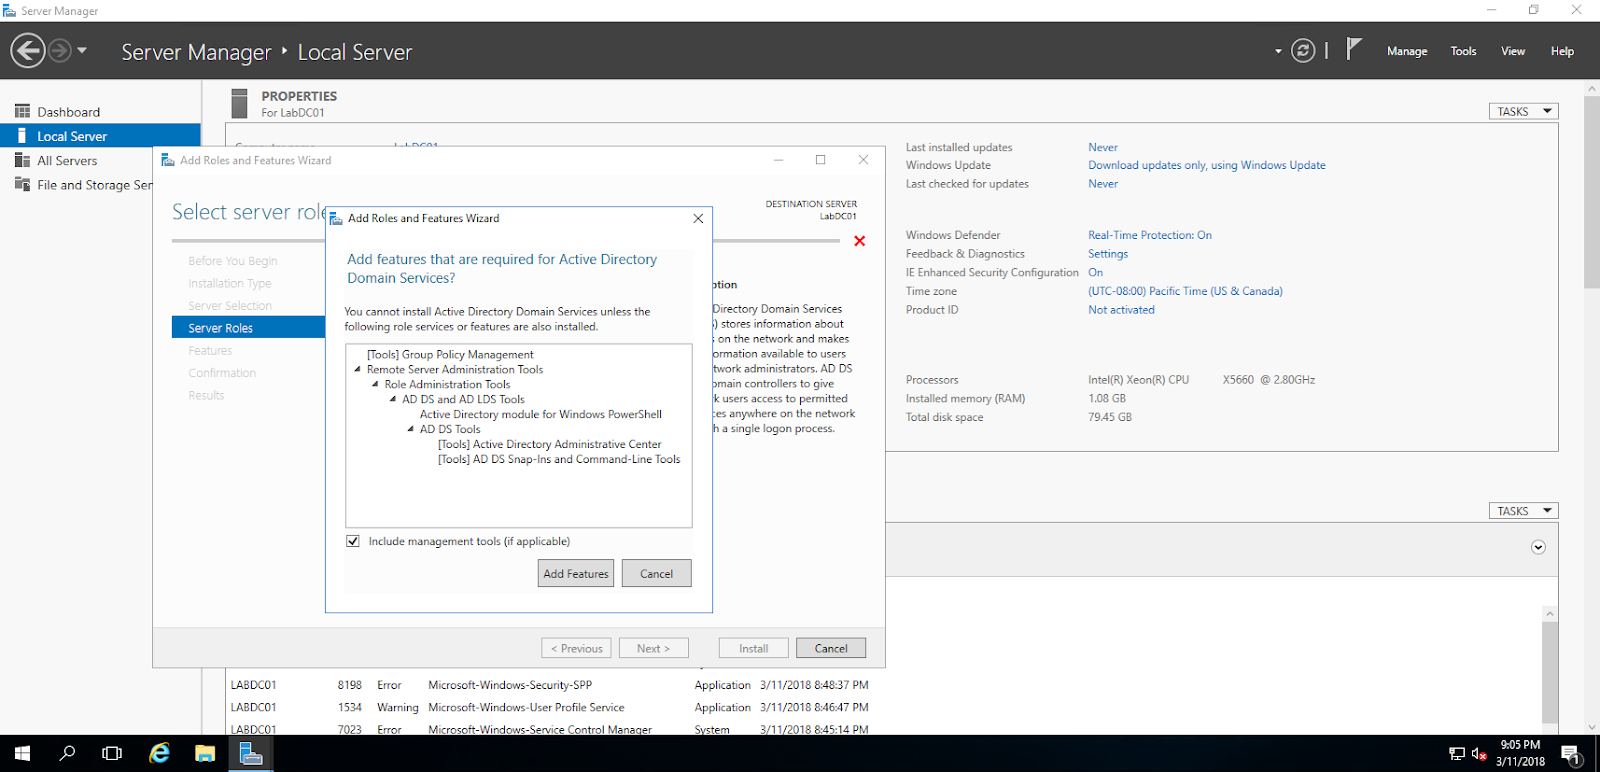
18. Chose “Role based or feature-based installation” and the current local server, check mark both “Active Directory Domain Services” and “DNS Server.” For each, a popup will ask if you want to add the features required for that service, click “Add features” in both occasions.
Promote this server to a domain controller
19. After installation, click the warning icon and then “Promote this server to a domain controller” wizard.

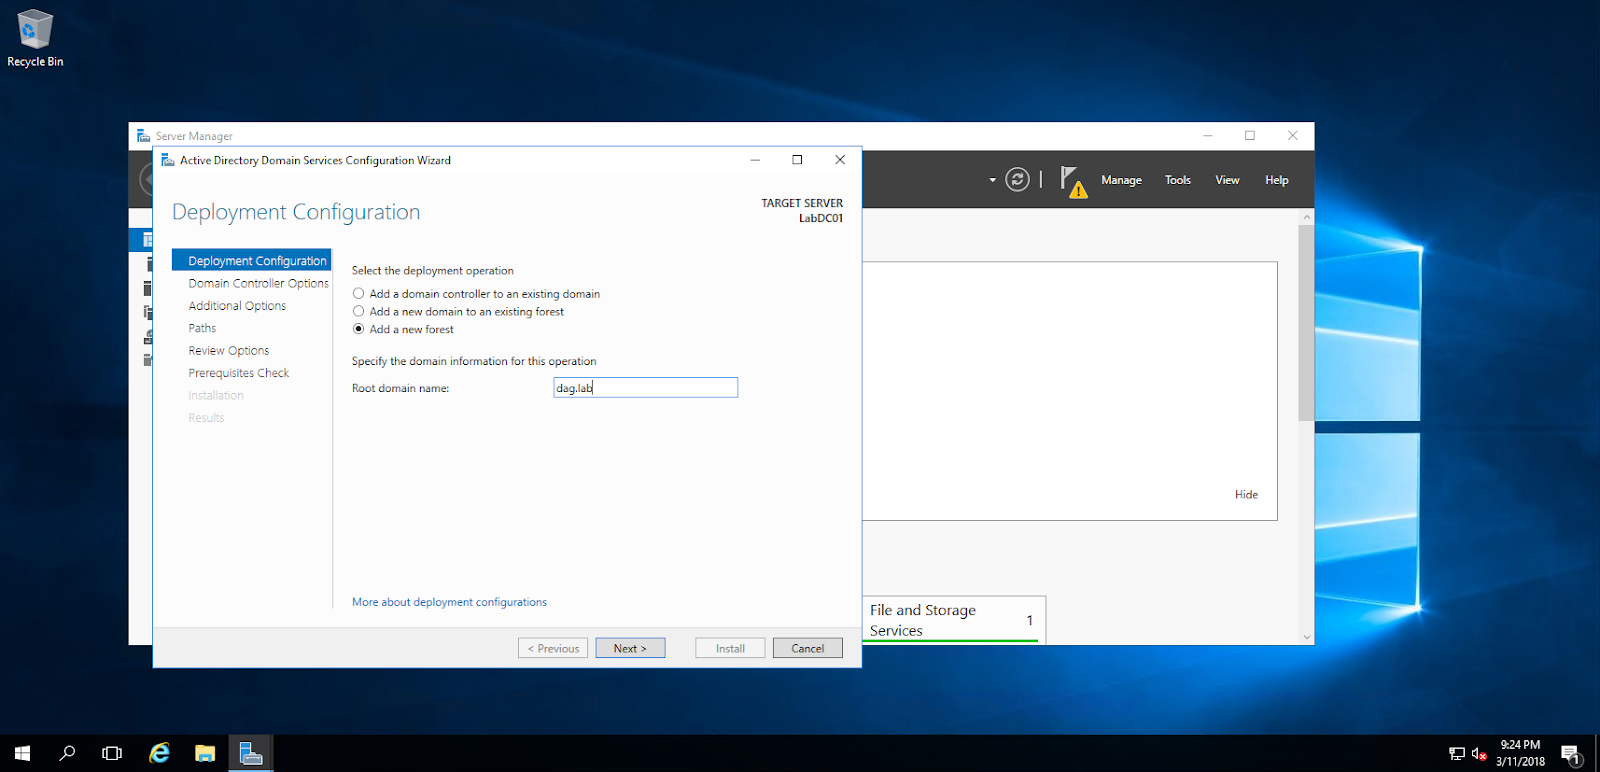
20. Click “Add a new forest” and give it a good domain name- for this purpose we’ll use two words separated by a period.
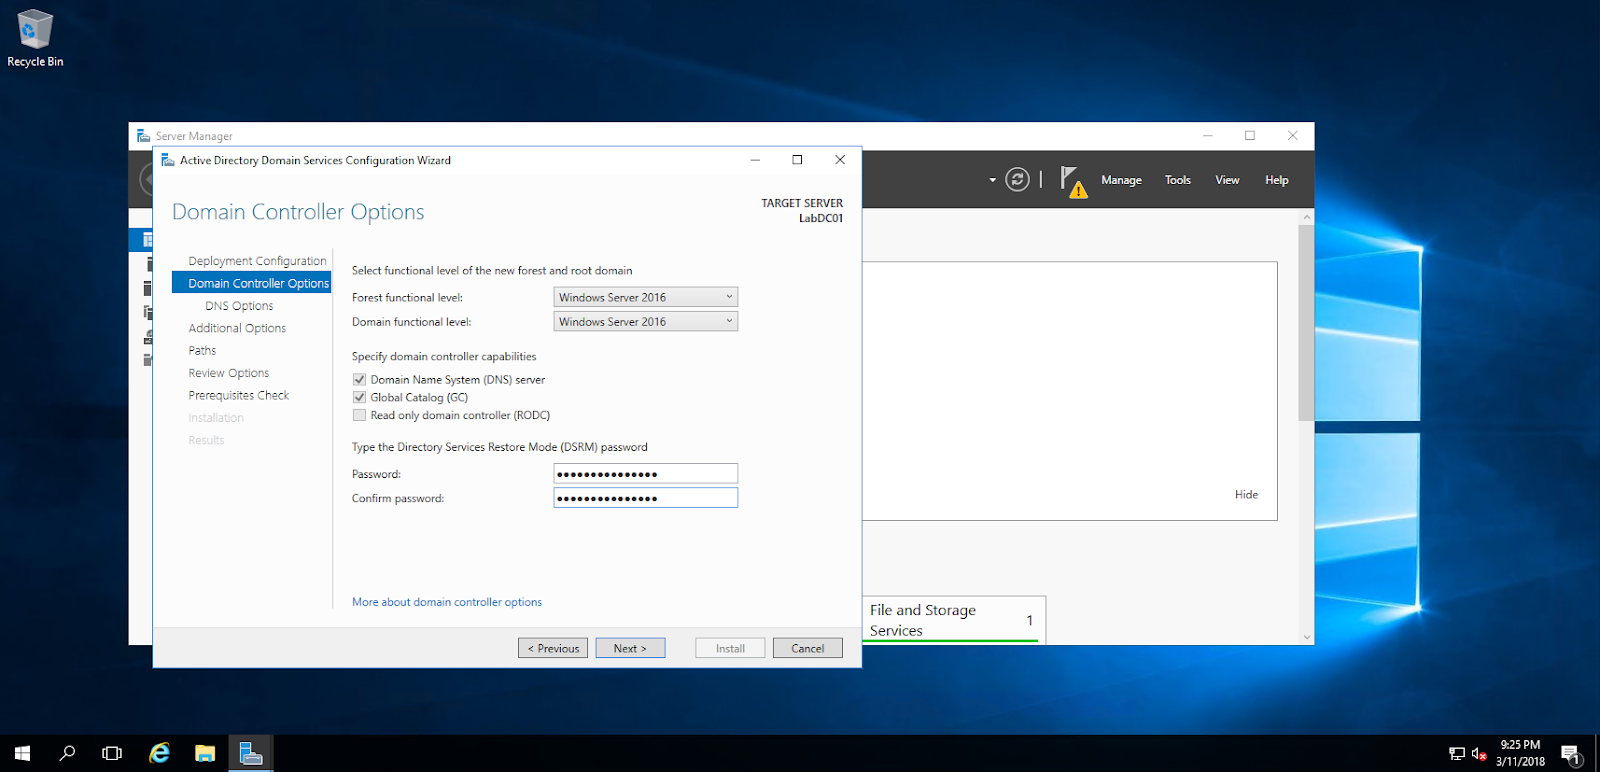
21. Type in a password for the directory services restore mode. The rest of the options are the defaults.
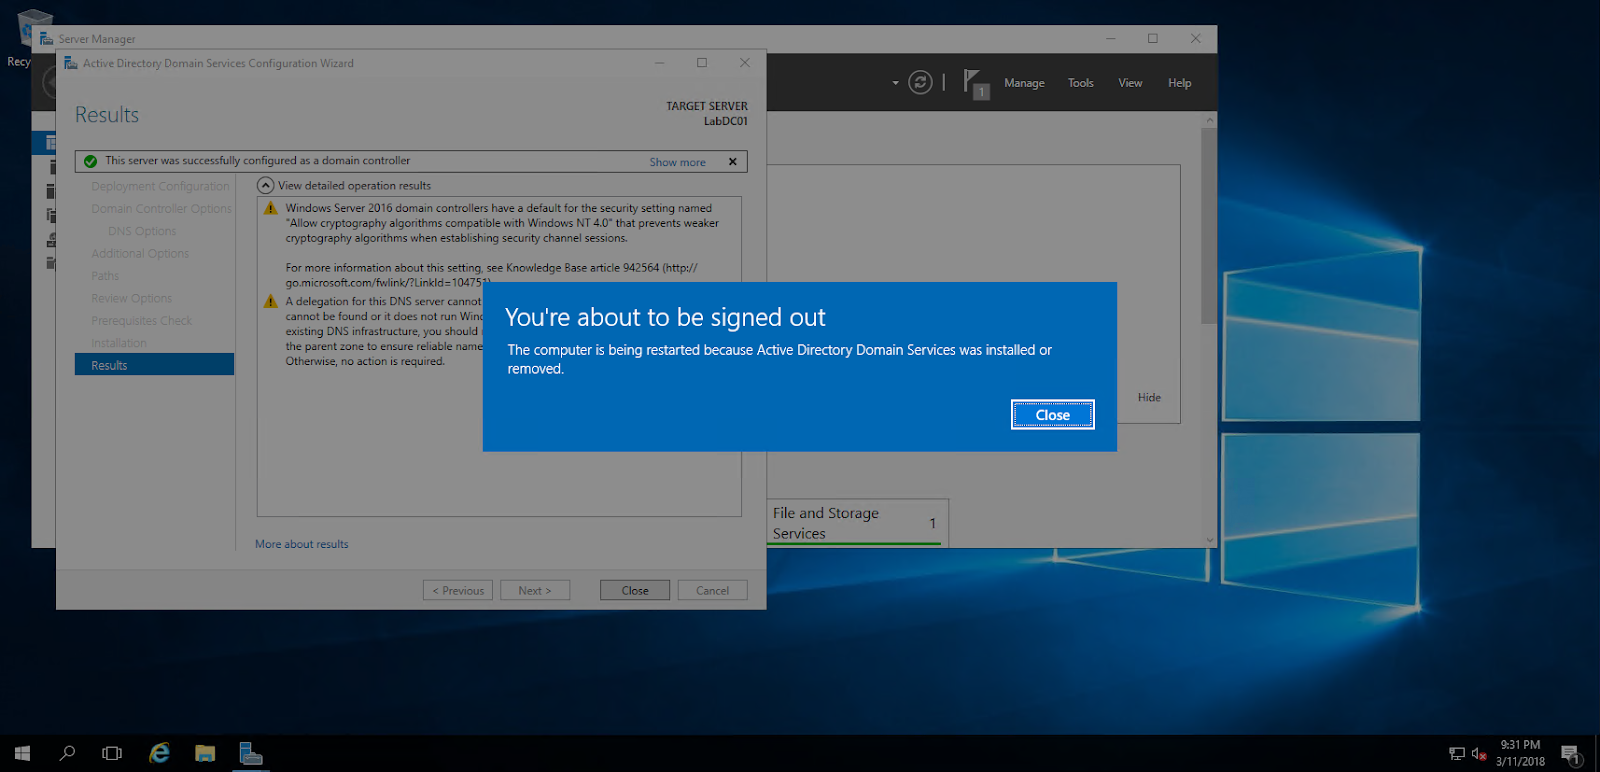
22. Accept the default paths and click “Install.”
23. The server will automatically reboot.
24. Finally go ahead and kick off Windows Updates, as per the usual.
We have created the primary domain controller and in the next post we’ll cover configuration and adding a second domain controller virtual machine.
Leave A Comment