This post describes the functionality of Business Events in a prior version. Since this post, the Flow/LogicApps connector has been much improved and does not require manual registration within F&O; therefore, power users are able to subscribe to events without IT administrator assistance! The F&O platform is improving every moment and we are in an exciting time for our beloved product 🙂
There are now many tutorials on Docs for using business events. Check out the Business Events Flow Tutorial for up to date steps.
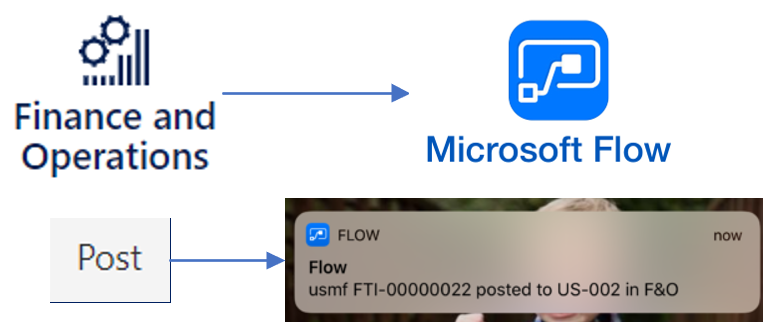
Set Up F&O Business Events with Microsoft Flow
With version 10 coming in April, fifteen (15) application events from Procure to Pay and Quote to Cash will be available out of the box in Dynamics 365 for Finance and Operations. They promise to be a powerful addition enabling self service for certain events, and better cloud integration by triggering an integration instead of periodically checking if something had been posted. Possible business scenarios:
- (Purchasing) Send me a push notification to my phone when a purchase order I submitted to workflow is approved.
- (Sales) Send me an email whenever an invoice is posted for my customer
- (Accounting/Credit) Track all customer write-offs in an Excel file on SharePoint online
- (Manufacturing) Set up a mobile notification when a purchase order for an upset customer is received so that you can expedite the material to the work center
- … the flexibility is amazing especially for an ERP
There are many ways to consume the business events straight from F&O:
Enable Business Events
Currently the business events feature is available in platform update 24. For those participating in Preview Early Access Program (PEAP) you can find a “PREVIEW – Dynamics 365 for Finance and Operations version 10.0” package in the shared asset library. Applying the package as normal, except you may need to click resume one or two times because of timeout issues. Microsoft has published the steps to enable Business Events on the v10.0 PU24 preview, at a high level you need to run a SQL statement to enable the feature, iisreset, enable it in the parameters, connect it to external message service(s), and run the job.

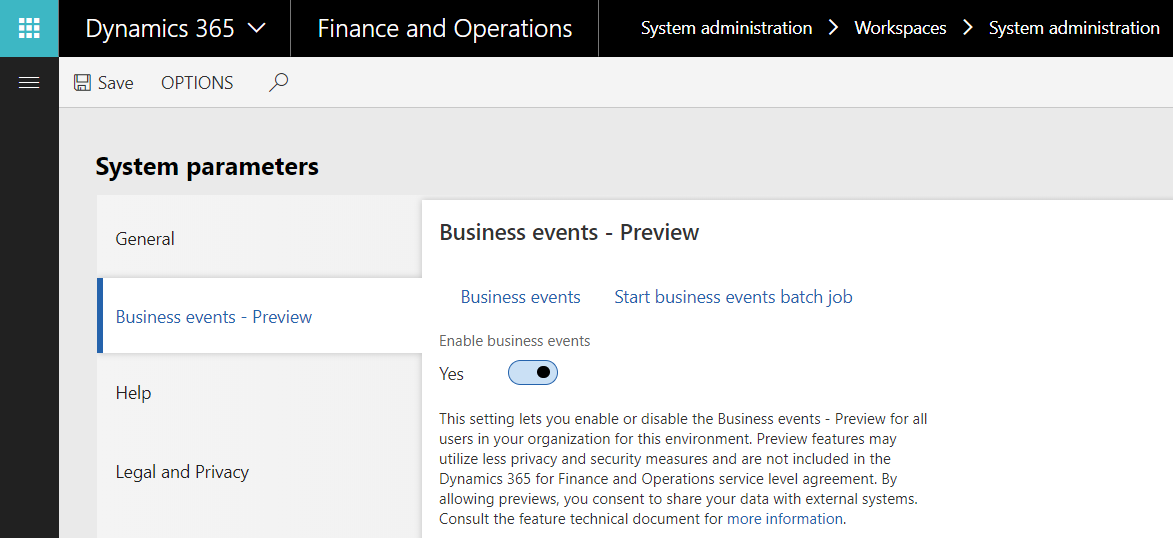
Business Events currently do not have a menu item, instead you can find the functionality under the Business Events – Preview tab of System Parameters. Turn it on, and get prepared for some fun!
We will need to create the Flow to accept the JSON event data and the Microsoft team has already anticipated our need to know what data elements are present within each particular event. Click on the Business Events link in the parameters form and select the business event in the business event catalog. Click the download schema link.
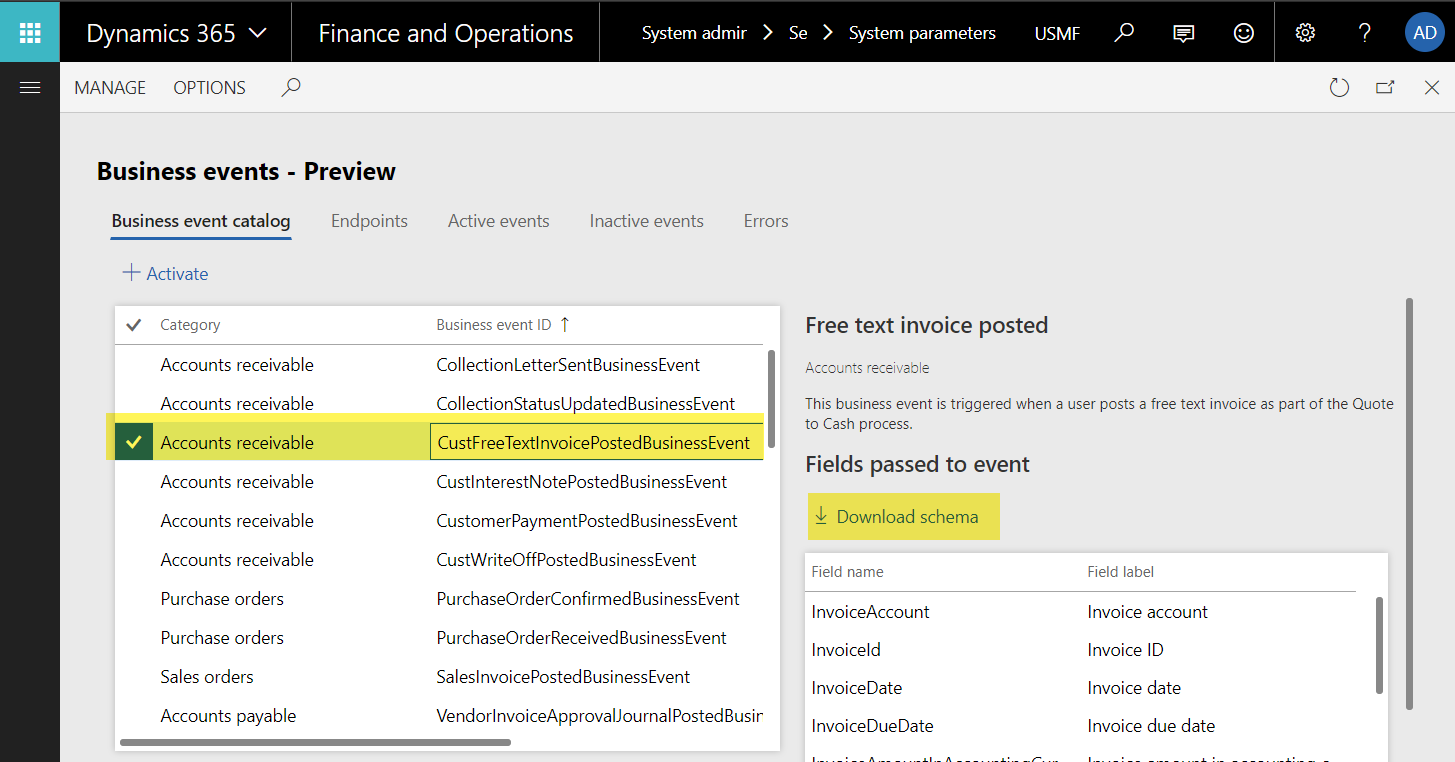
This will download a text file with the data elements in the correct format without any business data. On many of the events, the Legal Entity is included so logic can be specific to the legal entity.
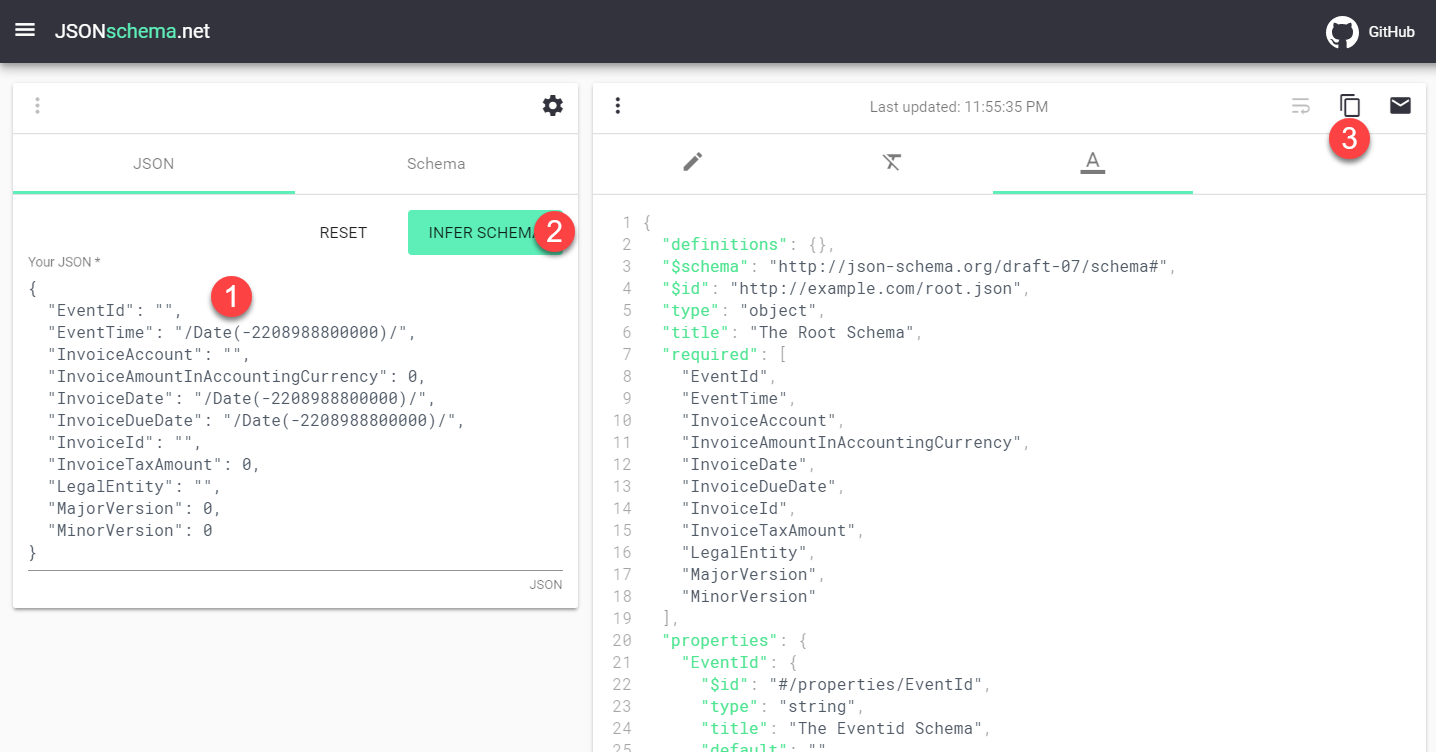
We will need to generate the JSON schema for the event, so that Flow can use each data element separately. Jump to jsonschema.net, paste the JSON on the left, click Infer Schema and save the output on the right pane.
Set Up a Flow
Before we can hook up FinOps to Microsoft Flow, we need to create a Flow using the JSON schema we just generated. The trigger for the flow is “When a HTTP request is received” and, when the free text invoice is posted, we will send a notification to my phone which has the Flow app installed and logged in. I put the request body JSON schema and changed the advanced settings to POST. For the notification, I merely needed to decide what text I wanted to appear. Here I have used included InvoiceID from FinOps.
Note: There is a way to directly create a Flow which will self-subscribe to events with a connector. There will be another post on how to accomplish this.
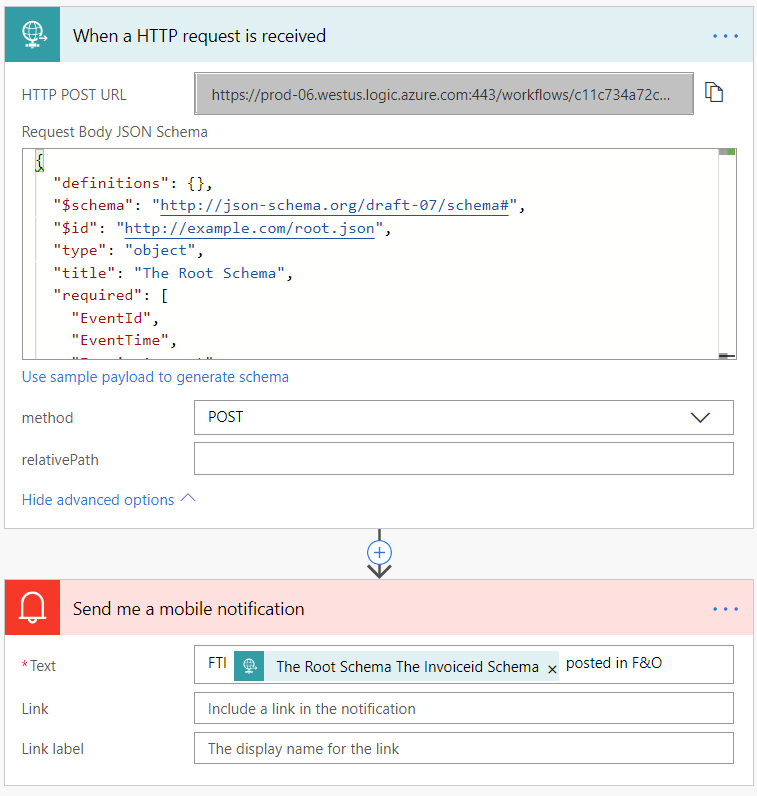
Save the HTTP POST URL because we will give this to FinOps to call.
Connect FinOps to The Flow
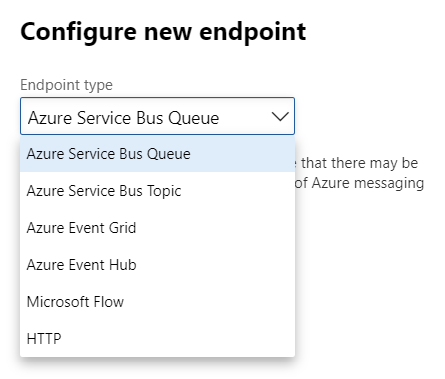
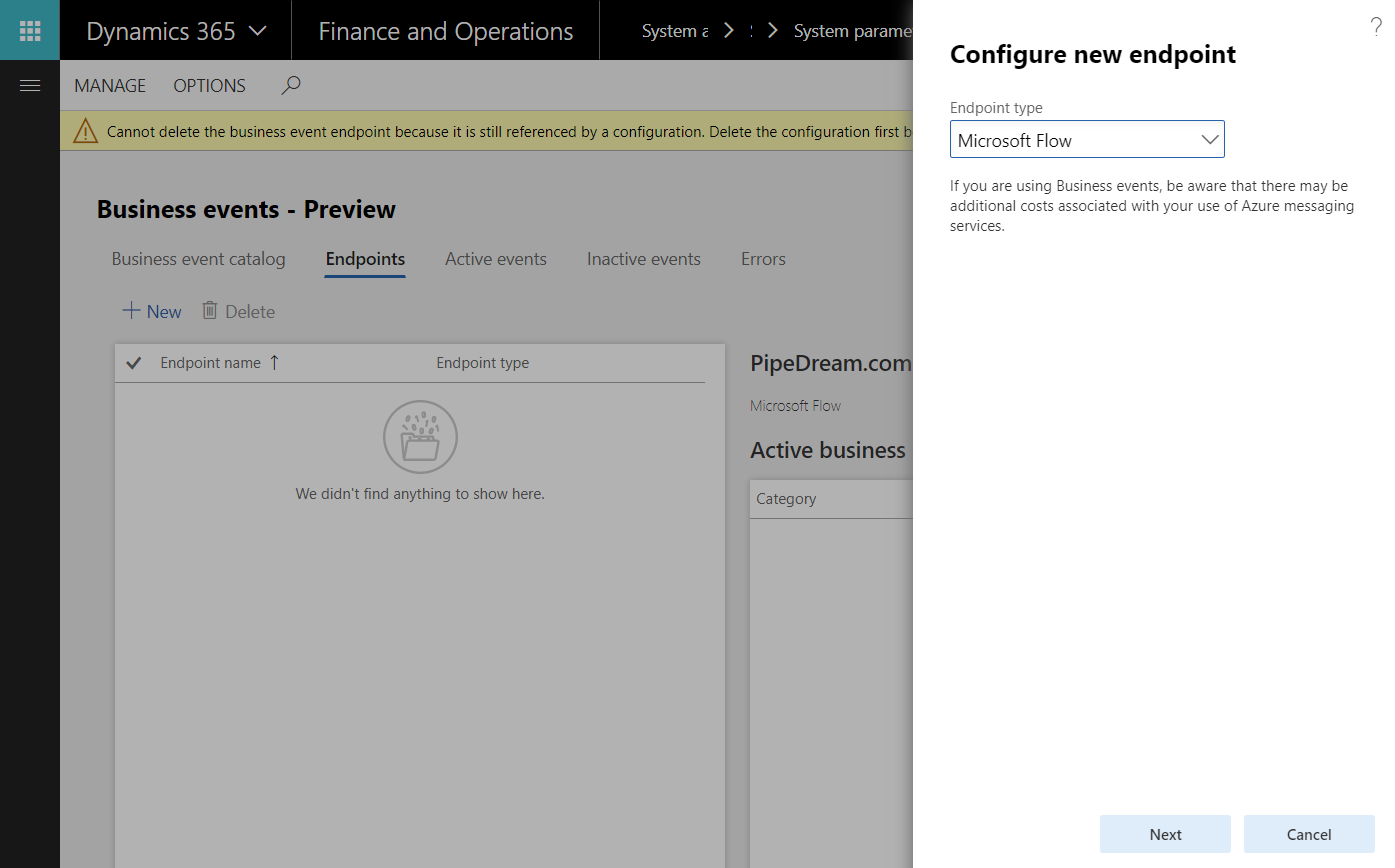
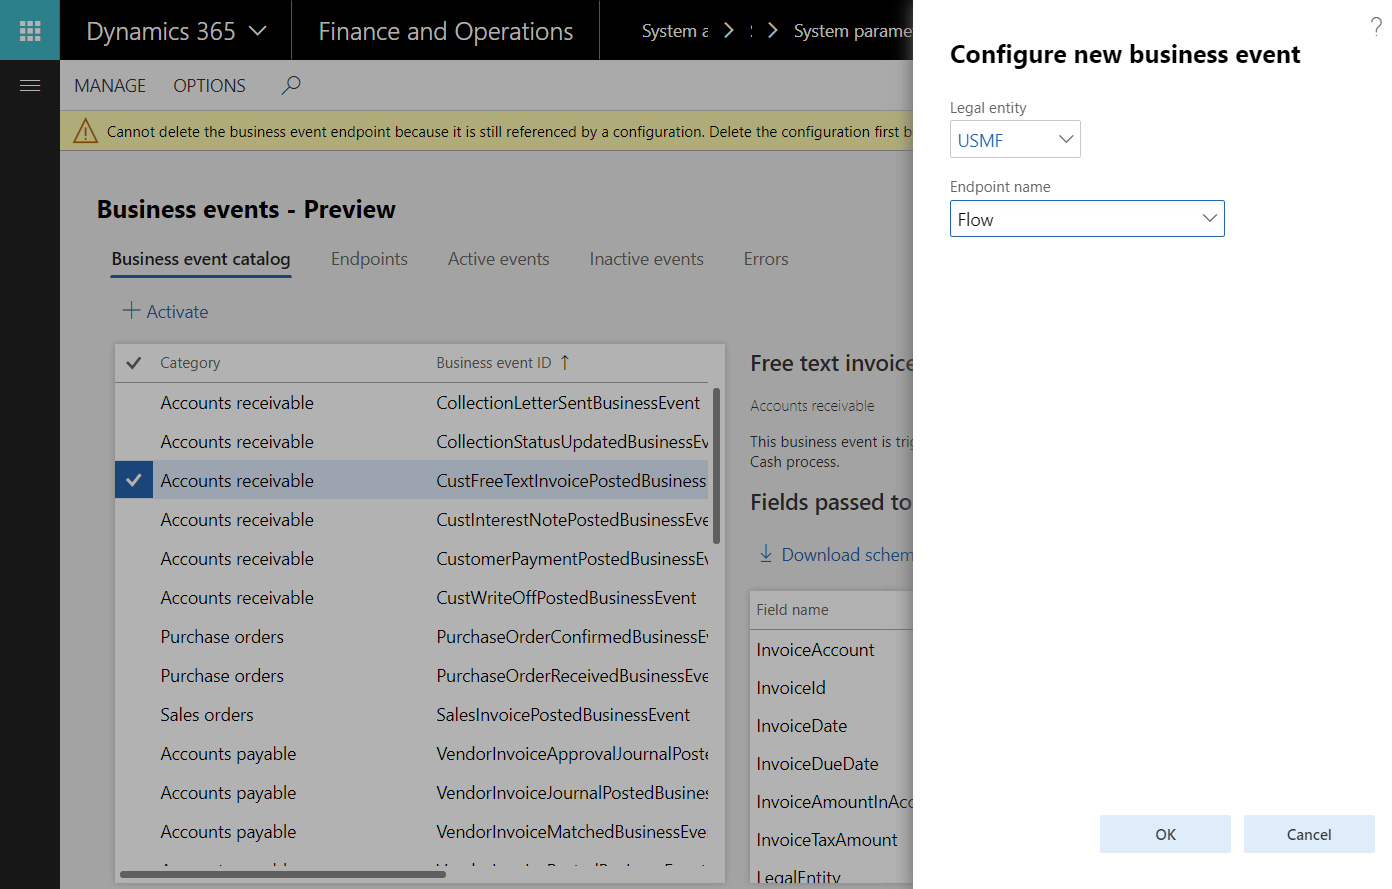
After clicking “Business Events” on the parameter page you are taken to a “Business events” form with several tabs, first go to “Endpoints” and set up a new Flow endpoint.
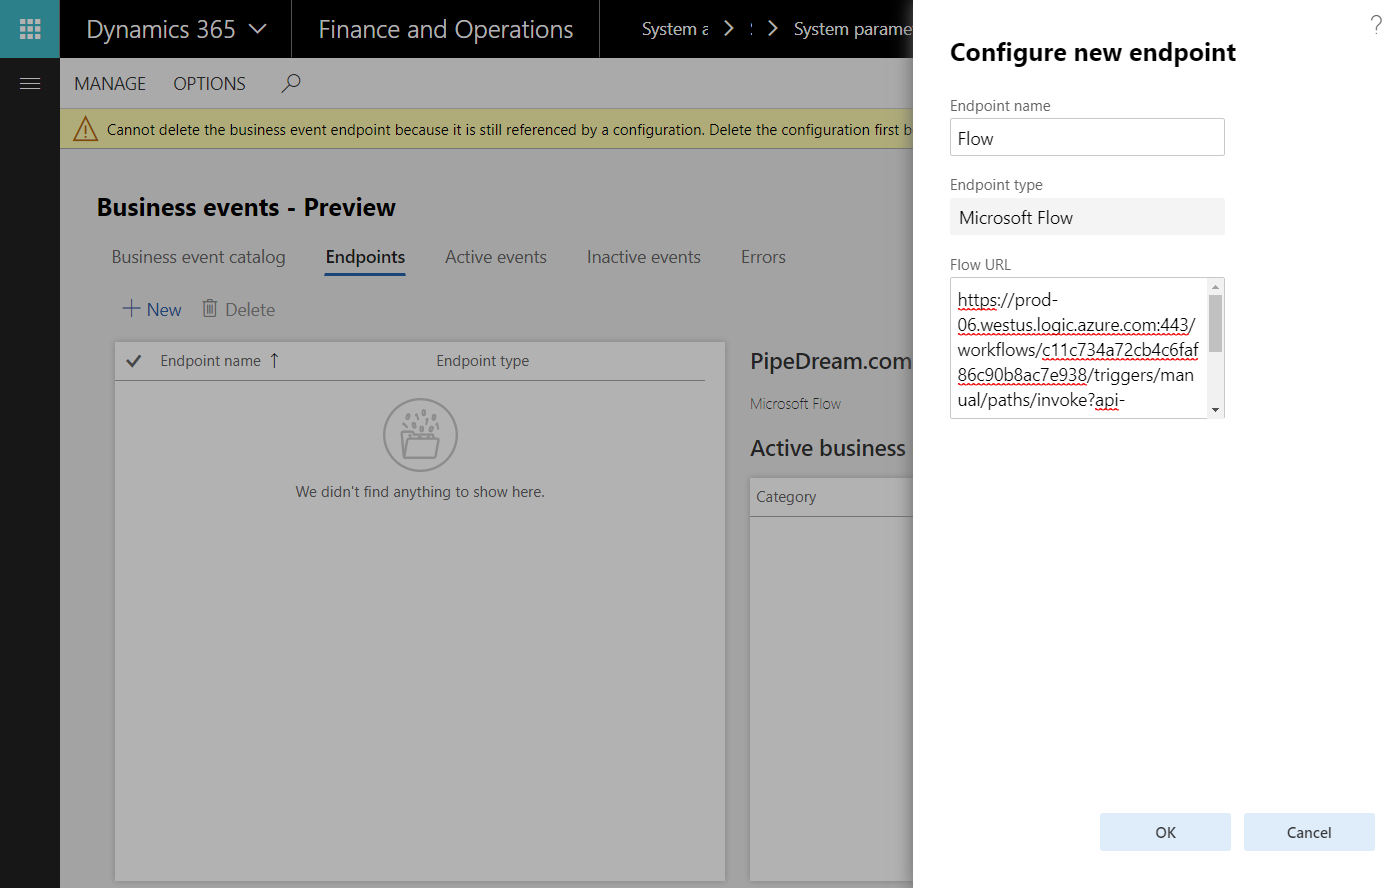
Paste the HTTP POST URL for the Flow into the Flow URL field.
Go back to the Business event catalog tab, select the event, click Activate.
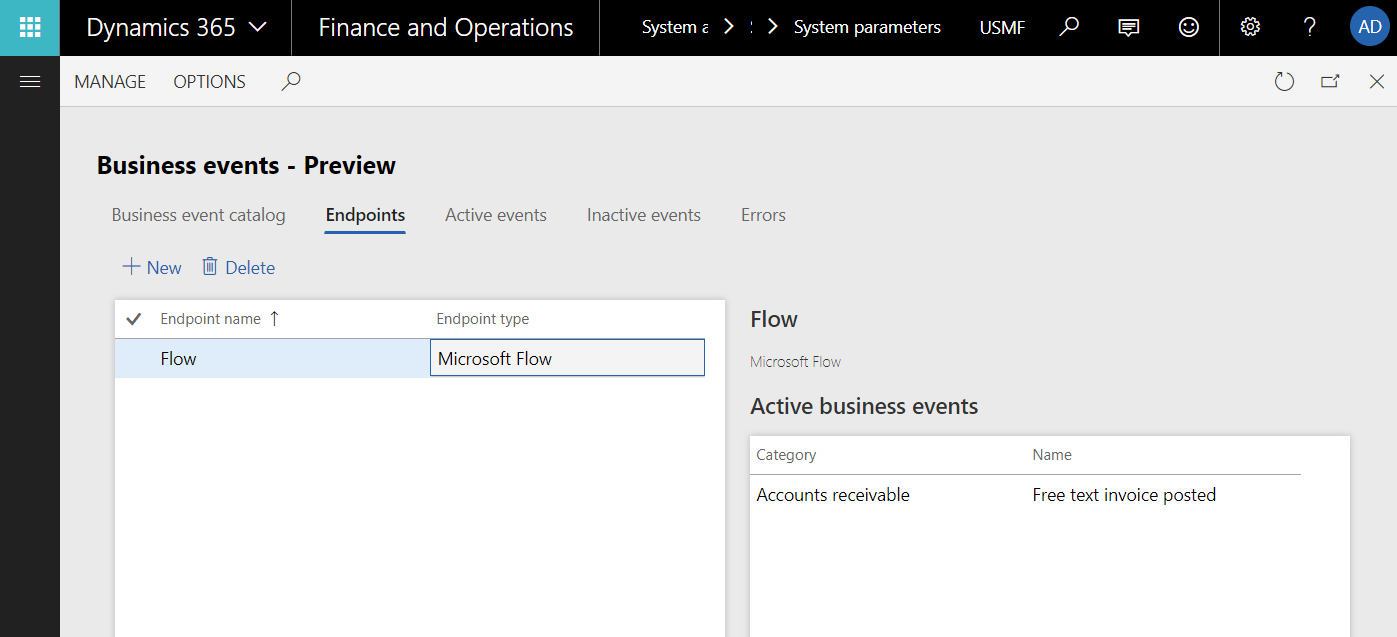
Clicking back on the Endpoints tab you’ll see the endpoint has one active business event. At this point, any Free text invoice posted will trigger the business event and that event will be forwarded to Flow when the batch job runs.
Trigger the Business Event
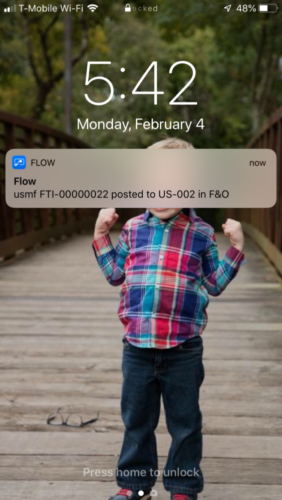
Open Accounts Receivable > Invoices > All free text invoices. Select an unposted FTI or create your own and post it. Go back to the System Parameters and run the batch job by clicking “Start business events batch job.” This will trigger the Flow and give you a push notification to your phone.




Hi,
Nice blog. Followed the steps which were easier to understand. Just having one query.
Is it possible to send the notifications to other devices configured with different email address ?
Hi Lalit,
You can send emails to anyone using the Office 365 send email connector, or many others as well (Gmail, …). It is also possible to send push notifications to other devices using external services, i.e. Twilio.
Dag III
Hi Dag III
thank you very much indeed due to sharing your knowledge with us.
in https://www.jsonschema.net/ , I entered the Download schema but this below message has shown:
Schema generation failed
Could you please help me?
Hi Dag III
I have another question , where did you enter you phone number?
Best Regards,
Zahra
If you end up using Power Automate Flow it takes your phone number from your profile. If you use Logic Apps, you’ll need to provide that phone number to the connector, whichever connector you have.
i want to know through this flows whenever my PO is approved through the workflow, system can trigger the notification to the requester who created the PR for the same Purchase order